Step by step for setting up Google Authenticator for Centos 7 remote SSH. A great tool for extra security for your new Server, Lab, Raspberry PI, etc.
First – Update
# yum update
Second – Install Google Authentication
Might need this Repo (Repository) if you do not already have it:
$ sudo yum install https://dl.fedoraproject.org/pub/epel/epel-release-latest-7.noarch.rpm
Install
$ sudo yum install google-authenticator
Run
$ sudo google-authenticator
Next will be a series of questions
Do you want authentication tokens to be time-based (y/n) y
I answered yes (y) this means that the codes/tokens are time based and are constantly changing to a different random code. This offers the best security. If answered no (n) then it will be sequential-based tokens so it starts at some number and it goes up in increments each time you log in. Time based seems smarter and there is no benefit to sequential that i can see.
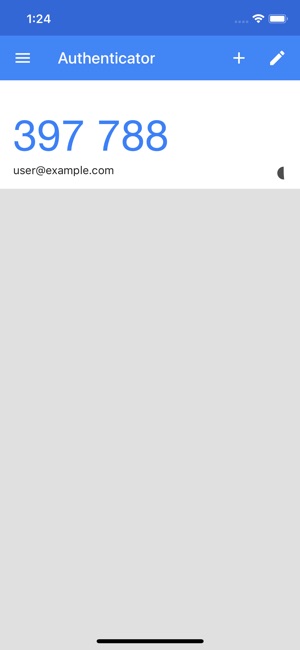
It will then produce a barcode open your terminal to full screen to see the whole thing. Take your phone and download Google Authenticator from the play store and set it up. Click the red plus sign in the bottom right corner and scan the barcode. if you are having issue with that you can open the link that is above the barcode.
Besure to take note of the:
- new secret key
- verification code
- emergency scratch codes
If you have a password manager this is the best way to store them, and also write them down and tape it to the side or back of your server. This is you back up to access via ssh if anything was to happen to your Google authenticator like you lost your phone.
Do you want me to update your "/home/USER_NAME/.google_authenticator" file (y/n) y
You want to answer yes or else it wont work and it just exits
Do you want to disallow multiple uses of the same authentication
token? This restricts you to one login about every 30s, but it increases
your chances to notice or even prevent man-in-the-middle attacks (y/n) y
By default, a new token is generated every 30 seconds by the mobile app.
In order to compensate for possible time-skew between the client and the server,
we allow an extra token before and after the current time. This allows for a
time skew of up to 30 seconds between authentication server and client. If you
experience problems with poor time synchronization, you can increase the window
from its default size of 3 permitted codes (one previous code, the current
code, the next code) to 17 permitted codes (the 8 previous codes, the current
code, and the 8 next codes). This will permit for a time skew of up to 4 minutes
between client and server.
Do you want to do so? (y/n) n
I answered no, what this is saying if even if you enter a code and it goes to the next code before you get logged in you can still use the code for another minute. You shouldn’t need more than a minute and 30 seconds to get in unless your connection is really slow. But the choice is yours.
If the computer that you are logging into isn’t hardened against brute-force
login attempts, you can enable rate-limiting for the authentication module.
By default, this limits attackers to no more than 3 login attempts every 30s.
Do you want to enable rate-limiting? (y/n) y
Just extra protection, so if somehow someone got your code and attempted to get in by guessing your password they cant try more than 3 times with the code they are trying to use.
Third – Get SSH to know about Google Authenticator
Using “nano” or “vim” or some text editor open
# nano etc/pam.d/sshd
Add
auth required pam_google_authenticator.so

Depending of if you add it and the top or bottom will dictate when the verification code is asked. I prefer it to be the first line that way no one has the ability to keep guessing/trying your password.
Then:
# nano /etc/ssh/sshd_config

Add:
ChallengeResponseAuthentication yes
You can just un-comment the line and change from no to yes but I keep it in there just in case i was troubleshooting and wanted to know what the default was. Of course any file you change its good to make a back up as well.
Save the file
Run command
# sudo systemctl restart sshd
If you are doing all of this remote via ssh running that command will not disconnect your session. Don’t close your current session, open a new terminal and remote in with ssh and it should first ask for the Verification Code which will come from your app then it will ask for a password.
Remember you have to ssh with the user id that you were logged in as when you ran “google-authenticator” the code that the app is providing is for that user only. If you forgot on the app it will show the user that the code is for

